
How to Secure Your Swipechain Node
When running an Swipechain node, especially a Delegate Node, you should consider your server's security as your main priority. This guide will walk you through securing your nodes. It is not an exhaustive guide, and highly platform dependent, but it is a good start.
We assume you completed all the steps as outlined in the previous guide: Setup Your Swipechain Node.
WARNING
During this guide, we will configure network and SSH parameters, which if improperly performed might permanently lock you out of your server. Ensure you fully understand each step before proceeding.
Security Through Obscurity
By outlining how to secure a node we're breaking a fundamental property of network security. We are telling people how we are defending our network. This breaks the security through obscurity(Wikipedia Reference) rule. If all nodes were secured in the same way, a single exploit might compromise the entire network. It is therefore vital that you consider other sources as well to secure your node.
Making Sure Our Server Is Updated
The first thing we're going to do is make sure we have the latest security updates for Ubuntu. Once everything installs, you will need to reboot to make sure all the upgrades applied adequately.
sudo apt-get update -y
sudo apt-get upgrade -y
sudo reboot
You may also consider having your server update itself automatically using a cronjob. A useful tool is cron-apt:
sudo apt-get install cron-apt
SSH Security
Edit Your SSH Config
Edit your sshd_config by running the following command.
sudo nano /etc/ssh/sshd_config
file: /etc/ssh/sshd_config
# What ports, IPs and protocols we listen for
Port 22
Change the 22 to a port of your choosing between 49152 and 65535. This is the new SSH port we will connect on. Since we are not using the default SSH port, it is crucial you do not forget what you choose, or you will not be able to access your server.
From now on port 22 is not usable for SSH connections.
file: /etc/ssh/sshd_config
# What ports, IPs and protocols we listen for
Port 55555
Authentication Settings
In the previous section, we had you create a new account for security purposes. You should never log in as root to your server after it has been set up. Our first security measure is going to be to disable root access altogether.
file: /etc/ssh/sshd_config
# Authentication:
LoginGraceTime 120
PermitRootLogin yes
StrictModes yes
Change LoginGraceTime to 60 and set PermitRootLogin to no
file: /etc/ssh/sshd_config
# Authentication:
LoginGraceTime 60
PermitRootLogin no
StrictModes yes
Disable X11 Forwarding
Set X11Forwarding to no.
file: /etc/ssh/sshd_config
X11Forwarding yes
X11DisplayOffset 10
PrintMotd no
PrintLastLog yes
TCPKeepAlive yes
#UseLogin no
/file: etc/ssh/sshd_config
X11Forwarding no
Limit Max Concurrent Connections
Scroll down until you see the following line and uncomment MaxStartups. Then set MaxStartups to 2.
/file: etc/ssh/sshd_config
#MaxStartups 10:30:60
#Banner /etc/issue.net
file: /etc/ssh/sshd_config
MaxStartups 2
#Banner /etc/issue.net
Save Your Config File
Press CTRL+X to exit the file, Y to save the file and then Enter to write to the file and return to the command line.
Restart SSH Daemon
sudo service ssh restart
exit
Test New SSH Connection
ssh user@yournode -p 55555
If everything was setup successfully, you should be reconnected to your Swipechain node. Replace 55555 with the port you chose when setting up your sshd_config.
Install Fail2Ban
What Is Fail2Ban
The basic idea behind fail2ban is to monitor the logs of standard services to spot patterns in authentication failures. For example, by finding many password authentication failures originating from a single IP, whois commands shortly after connecting over SSH or other known exploits.
WARNING
Fail2Ban can reduce the rate of incorrect authentications attempts however it cannot eliminate the risk that weak authentication presents. Configure services to use only two factor or public/private authentication mechanisms if you want to protect services.
Installation
Install Fail2Ban and create local configuration file.
sudo apt-get install fail2ban
sudo cp /etc/fail2ban/jail.conf /etc/fail2ban/jail.local
Configuration
Find all the references that specify port = SSH (typically in the SSH header section) and change the port to the new one you selected in the SSH security section above.
sudo nano /etc/fail2ban/jail.local
File: /etc/fail2ban/jail.local
#
# SSH Servers
#

[sshd]
port = ssh
logpath = %(sshd_log)s


[sshd-ddos]
# This Jail Corresponds to the Standard Configuration in Fail2ban
# The Mail-Whois Action Sends a Notification E-Mail With a Whois Request
port = ssh
logpath = %(sshd_log)s

[dropbear]
port = ssh
logpath = %(dropbear_log)s


[selinux-ssh]
port = ssh
logpath = %(auditd_log)s
maxretry = 5
Save Your Config File
Press CTRL+X to exit the file, Y to save the file and then Enter to write to the file and return to the command line.
Restart Fail2Ban Daemon
sudo service fail2ban restart
exit
Port Knocking
What Is Port Knocking?
Port knocking is a technique used which obscures the port you're connecting on to prevent port scanning by opening and closing it when you need it. We will use a series of ports to essentially "knock" and your server will open your configured port for you to connect on by listening for connection attempts on those ports in a specific order.
Disable UFW
By default, UFW comes enabled with Ubuntu 16.04. If you get ufw command not found then run.
sudo apt-get install ufw
sudo ufw disable
You can verify that UFW is disabled by running sudo ufw status and get a response of inactive.
Disable All Incoming Connections
sudo ufw default deny incoming
Enable Node Port
Depending which network this node is for will determine what port you open here. For mainnet use 4001, devnet use 4002, and testnet use 4000 and public API which is by default located on port 4003.
We don't want to open any more ports than required to operate securely so we will open P2P port depending on the network (in our example for mainnet) and public API port.
sudo ufw allow 4001/tcp
sudo ufw allow 4003/tcp
Install Knockd on Server
sudo apt-get install knockd -y
Start Knockd Server on Boot
sudo nano /etc/default/knockd
We need to change START_KNOCKD=0 to START_KNOCKD=1
File: /etc/default/knockd
################################################
#
# knockd's default file, for generic sys config
#
################################################

# Control if We Start Knockd at Init or Not
# 1 = start
# anything else = don't start
#
# PLEASE EDIT /etc/knockd.conf BEFORE ENABLING
START_KNOCKD=0

# Command Line Options
#KNOCKD_OPTS="-i eth1"
File: /etc/default/knockd
...
START_KNOCKD=1
...
Then press CTRL+S, then answer Y and finally press ENTER to return to the command line.
Edit Config
sudo nano /etc/knockd.conf
Knock Ports
Here we're going to pick our opening and closing knock sequence. Choose three ports between 7000 and 40000 for each opening and closing. Write these ports down. The sequences need to be different.
Modify your config file to match the one below with your own ports. We do not recommend just copying and pasting this config. Replace 7000, 8000, 9000 with your own choices.
Also, don't forget to replace 55555 with the port you chose for SSH.
File: /etc/knockd.conf
[options]
        UseSyslog

[openSSH]
        sequence    = 7000,8000,9000
        seq_timeout = 5
        command     = ufw allow 55555/tcp
        tcpflags    = syn

[closeSSH]
        sequence    = 9000,8000,7000
        seq_timeout = 5
        command     = ufw delete allow 55555/tcp
        tcpflags    = syn
Enable Our Firewall and Start Knockd
sudo service knockd start
sudo ufw enable
Checking Knockd and Ufw Status
sudo service knockd status
sudo ufw status
Install Knockd Client
Install a client for your operating system to make knocking easier. There are even a couple of mobile apps you can use for quickly knocking on your server to open your ssh port.
After knocking your port will remain open until you send the closing knock sequence.
Ubuntu 16.04
sudo apt-get install knockd
Alternate Clients
Troubleshooting and Testing
Logs for knockd appear in syslog and will be crucial if you need to troubleshoot.
Run the following command on your Swipechain node server.
tail -f /var/log/syslog
Let us test our knocking! We set our SSH port, and we've enabled knocking. Now we need to check to make sure that when we send the correct knock that we open and close the port correctly.
Open SSH Port
From your personal computer or mobile phone use the client you installed above or if you are running Linux install knockd by running sudo apt-get install knockd and use the following command to knock.
knock -v nodeip 7000 8000 9000
You should see the following logs appear in your syslog
Apr 17 04:02:18 node1 knockd: nodeip: openSSH: Stage 1
Apr 17 04:02:18 node1 knockd: nodeip: openSSH: Stage 2
Apr 17 04:02:18 node1 knockd: nodeip: openSSH: Stage 3
Apr 17 04:02:18 node1 knockd: nodeip: openSSH: OPEN SESAME
Apr 17 04:02:18 node1 knockd: openSSH: running command: ufw allow 55555/tcp
Running sudo ufw status should list your SSH port as enabled.
swipechainoar@node1:~$ sudo ufw status
Status: active

To                         Action      From
--                         ------      ----
2086/tcp                   ALLOW       Anywhere
4002/tcp                   ALLOW       Anywhere
55555/tcp                  ALLOW       Anywhere
2086/tcp (v6)              ALLOW       Anywhere (v6)
4002/tcp (v6)              ALLOW       Anywhere (v6)
55555/tcp (v6)             ALLOW       Anywhere (v6)
Close SSH Port
knock -v nodeip 9000 8000 7000
Apr 17 04:23:37 node1 knockd: nodeip: closeSSH: Stage 1
Apr 17 04:23:37 node1 knockd: nodeip: closeSSH: Stage 2
Apr 17 04:23:37 node1 knockd: nodeip: closeSSH: Stage 3
Apr 17 04:23:37 node1 knockd: nodeip: closeSSH: OPEN SESAME
Apr 17 04:23:37 node1 knockd: closeSSH: running command: ufw delete allow 55555/tcp
SSH Connection Using Your Keypair
WARNING
If you do not copy the correct key to your server, in the right location, you will be unable to authenticate.
If you are not comfortable managing SSH keys, you can continue logging in via a password, but it is less secure.
SSH keys should be generated on the computer you wish to log in from. Just press enter and accept all the defaults.
MacOS / Linux
ssh-keygen -t rsa
Browse to your ~/.ssh directory and check to make sure it worked. You should see the following files.
cd ~/.ssh
ls -l

-rw------- 1 travism travism 1675 Mar 28 12:13 id_rsa
-rw-r--r-- 1 travism travism  401 Mar 28 12:13 id_rsa.pub
-rw-r--r-- 1 travism travism 3764 Apr 16 23:15 known_hosts
Copy your key to your server
# Open SSH Port It Not Already Open
knock -v nodeip 7000 8000 9000

# Copy Key
ssh-copy-id -p 55555 user@nodeip
Windows
Windows users can generate their ssh key using PuTTY Key Generator
Copy your PUBLIC KEY to your Server
Copy the contents of your id_rsa.pub file on your local machine to your ~/.ssh/authorized_keys on your Swipechain node server.
Disable Password Authentication
sudo nano /etc/ssh/sshd_config
This file should look familiar to you as we edited it earlier in this process. This time we're going to disable password authentication. Set
PasswordAuthentication to no and make sure that PubkeyAuthentication is set to yes and ChallengeResponseAuthentication is set to no.
file: /etc/ssh/sshd_config
PasswordAuthentication no
PubkeyAuthentication yes
ChallengeResponseAuthentication no
Save your changes by pressing CTRL+X, then respond with Y, and finally press ENTER to write to file.
Restart SSH
sudo service ssh restart
The next time you log in you should log right in without a password prompt.
DDOS Protection With Cloudflare
In this section, we're going to setup Cloudflare and SSL for DDoS protection and security using Nginx as a reverse proxy.
Install Nginx
sudo apt-get install nginx
Edit Nginx Config
sudo nano /etc/nginx/sites-enabled/default
Paste in the following config, making sure you edit the server_name and proxy_pass. You may need to change ssl_certificate and ssl_certificate_key
if you name your files something different.
File: /etc/nginx/enabled-sites/default
# HTTPS
server {
  listen 443 ssl;
  server_name node.yoursite.com;
  ssl_certificate /etc/nginx/ssl/swipechain.crt;
  ssl_certificate_key /etc/nginx/ssl/swipechain.key;
  ssl_verify_client off;
  ssl_protocols TLSv1 TLSv1.1 TLSv1.2;
  ssl_ciphers EECDH+CHACHA20:EECDH+AES128:RSA+AES128:EECDH+AES256:RSA+AES256:EECDH+3DES:RSA+3DES:!MD5;
  ssl_prefer_server_ciphers on;
location / {
    proxy_set_header X-Real-IP $remote_addr;
    proxy_set_header X-Forwarded-For $proxy_add_x_forwarded_for;
    proxy_set_header X-NginX-Proxy true;
    proxy_pass http://localhost:4001/;
    proxy_ssl_session_reuse off;
    proxy_set_header Host $http_host;
    proxy_cache_bypass $http_upgrade;
    proxy_redirect off;
  }
}
Press CTRL+X to exit the file, Y to save the file, and ENTER to write to the file and return to the command line.
Cloudflare / SSL Setup
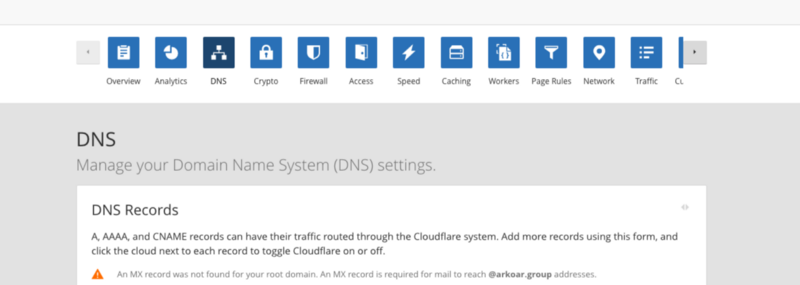
Login to your Cloudflare dashboard and click on the DNS button.
Then go to Crypto.

Scroll down to Origin Certificates and click the Create Certificate button. Keep this window open after Cloudflare generates your two keys.

Open Terminal on your Swipechain node server
We need to create a new folder and copy our keys to our server.
mkdir /etc/nginx/ssl
cd /etc/nginx/ssl
touch swipechain.crt swipechain.key
Copy the PRIVATE KEY to the file swipechain.key and the CERTIFICATE to swipechain.crt.
Start Nginx
sudo service nginx start
If everything started fine, you should be able to access your Swipechain node API's behind SSL. Giving you the bonus of Cloudflare DDOS protection.
Otherwise, if you get any errors run the following command to troubleshoot nginx.
sudo nginx -t -c /etc/nginx/nginx.conf
Conclusion
Your node is now very secure. With this setup, you can open and close your SSH port remotely using a secret knocking technique as well as sign in using cryptographic keys.